DIY PROJECTS
Hanging Votives
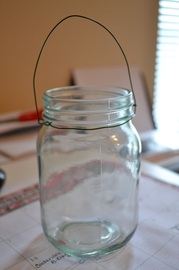
After I found 30" shepherd's hooks at Dollar Tree for $1/piece, I knew I needed to come up with some hanging votive candleholders to hang on them at the wedding! I didn't find anything cheap enough at Hobby Lobby, and so changed my focus on just candleholders with a "lip" edge to use wire to hang them. That search was fruitless as well, til I remembered I had some of these Wal-Mart brand canning jars!
I posted a tutorial on my blog HERE, but here's the cost breakdown:
- 10 shepherd's hooks + 10 more I plan to buy = $20
- Floral wire (on-hand): $1.25ish
- Canning jars (not incl. the pack I already had): $6.84/12 pack
TOTAL: $28.09
$1.34 a piece
(even if you include the cost of the pack I already owned, though I only had 9 left, It still comes to $1.46 a piece!)
table numbers
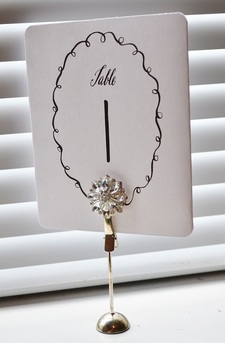
At first I wasn't going to do assigned tables, but the more I thought (& read) about it, I realized it's probably going to make things run more smoothly.
So I picked up the flower-y holders at Hobby Lobby (They were 50% off, so I grabbed 2 packs of 4 totaling $9.99). I don't think I should need more than the 8 total holders that I bought. I will add, the are not as sturdy as I'd like. I know they're small little weights with clips attached, but still, if you blow on them slightly they tip over! But I doubt I'll find anything better for that price!
As for the cardstock with the table numbers - oh, what a pain! I think this was the most time consuming project so far (okay, exaggerating!). The design is from Martha Stewart, one of the free downloadables on her website. However, I tweaked it a bit, and I'll shorten this to the essential steps, since it took a lot of trial & error: I didn't like the numbers on hers, and I couldn't figure out how to change the size for printing. So first, I did Print Screen on my keyboard, and copied the image into Paint.NET, where I erased the number as well as the oval outline around the entire design (because I wanted rectangular cards, not oval). I used the font MA Sexy from DaFont.com, it matches well with the calligraphy design. I bought 110 lb. cardstock at Walmart (about $5 for 150 sheets, which I know I'll use again). It's not super thick, but it'll do! I saved the table # images at about 4.5 x 6.5 inches, 300 dpi to maintain clarity. Then I opened the image, and printed as 3.5 x 5 inches (where it can fit 4 per page) but I only selected 2 per page, so they print side by side.
Next, I'd flip the paper around and re-print the next number, so I could fit 2 numbers per sheet (to save paper). Then I folded the paper in half, so the design is on both sides of the sheet. I trimmed, using another piece of cardstock as a guide for the straight lines, and then used my corner rounder punch to round the edges. Next I used double-sided tape to tape the front & back together.
Place card holders: $4.99 x 2 = $9.99
Cardstock: $5.77
TOTAL: 15.76
(but that's not factoring in all the extra cardstock I have, and will get use out of! So really I consider it a $10 project, just the cost of the holders.)
Menu Chalkboard Sign
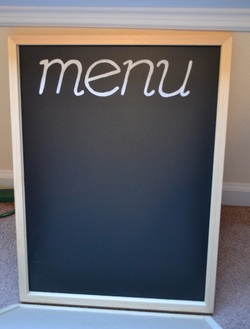
Same size as the entrance sign below, 8.99 at Hobby Lobby. I'll use real chalk to write in the menu for our buffet (just in case anything changes last minute).
Entrance Chalkboard Sign
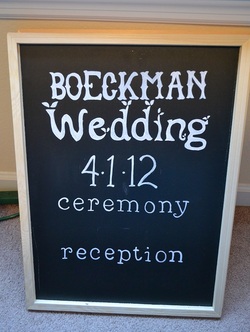
I bought 2 of the medium sized chalkboards at Hobby Lobby (8.99 each) and used the same method as my guestbook sign, I wrote on them with a white paint pen. However, these are different: the black part isn't like a real chalkboard, it's actually plastic, I think? So when I used an Exacto blade to trace each letter, I had to use a LOT of force to "cut" the chalkboard part, to leave a visible scratch to trace over. The smaller chalkboard (made with slate, I guess?) are much easier, because just a tiny bit of pressure with the Exacto blade leaves a barely-visible scratch to trace with the paint pen. Just an FYI!
I left the area under "ceremony" and "reception" blank, so I'll use a real piece of chalk to draw arrows (since the direction may change based on where we hang these/stand them up, which we haven't decided yet)
I left the area under "ceremony" and "reception" blank, so I'll use a real piece of chalk to draw arrows (since the direction may change based on where we hang these/stand them up, which we haven't decided yet)
Chair Signs
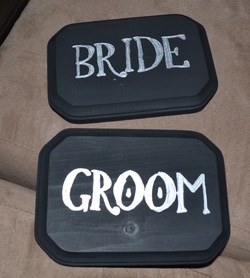
I bought wood plaques at Hobby Lobby, they're about 4x6 inches. I painted them with black acrylic paint, and using my previous technique I "traced" the letters on with an Exacto knife, then painted with a medium-point silver paint pen. I took the picture before I hot glued green ribbon to the back, to tie them onto the chairs.
"Cards" Banner
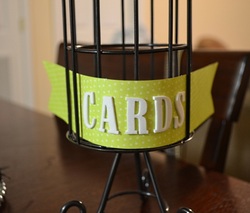
For a cardholder, I'll be buying a white birdcage (the basic Wilton one you can find everywhere). I went ahead and made this "banner" out of green scrapbook paper, and white foam stickers for scrapbooking (I already had the stickers lying around; the paper, I bought one sheet at Hobby Lobby). This was easy, and I love the look of it - which I think will tie in nicely to the green banners on our invitations. This picture shows it weaved through a faux birdcage I use for decoration in my home, to give an idea of what it will look like.
COST:
approx. $.50 for green paper!
COST:
approx. $.50 for green paper!
Guestbook Chalkboard
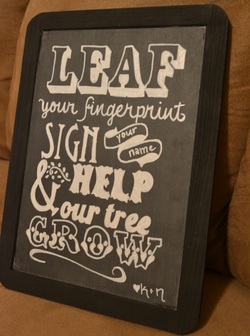
I'll explain this one: For our guestbook, we'll be using a poster print of a tree with our names & wedding date. Guests will stamp their finger in ink, and use their fingerprints as our "leaves" on the tree, and then sign their name. I loved this idea, so that we could frame and use the poster as decoration in our home. So to explain how to "sign" our guestbook, I made this chalkboard sign. I bought a chalkboard at Hobby Lobby (approx 9x11 inches) and painted the bare wood frame with black acrylic paint. Then I traced the wording I wanted (in the fonts I wanted) onto a sheet of paper, and taped it to the chalkboard. I used an Exacto knife to carefully "trace" every line of every word, which leaves a faint scratch on the chalkboard; then I used a white fine-point paint pen to trace those scratches, leaving me with this! I wanted to use the paint pen instead of real chalk, so it can't smear but still has that chalk "effect".
Favor Tags
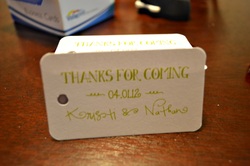
I ordered Premium Business Cards from VistaPrint for free (just paid shipping) and also bought a corner rounding punch, and used my single hole punch. It was easy, just tedious and tiring; I rounded the corners and punched a hole, one card at a time! I'll use ribbon to tie them to the chocolate lollipops I'm making as favors.
Cupcake topper
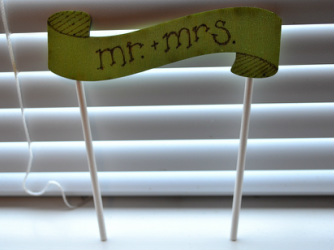
If you look on my inspiration page, you'll see an adorable cake topper made by a seller on Etsy. But I don't want to pay $25 for it. So I scoured Ebay, and found a seller who makes wood cut-outs for around $1 a piece. I bought 2 of these banners, including shipping, for $3.71. I also bought a woodburner to make the design (shown in the picture already sketched on with a pencil).
The woodburning could be better, but it was a cheap woodburner so I'm satisfied with it. The coolest part was that I used Kool-Aid to dye it green! I just mixed some of the lemon-lime flavor with water so it was a pretty concentrated shade of green, and used a brush I had on-hand (a cheap foundation brush, actually) to paint on, probably 10 coats. I did the back side too, for continuity. Then I hot-glued 2 lollipop sticks to the back which will be inserted in 2 cupcakes at the wedding (which will be the bride & groom's cupcakes!)
The woodburning could be better, but it was a cheap woodburner so I'm satisfied with it. The coolest part was that I used Kool-Aid to dye it green! I just mixed some of the lemon-lime flavor with water so it was a pretty concentrated shade of green, and used a brush I had on-hand (a cheap foundation brush, actually) to paint on, probably 10 coats. I did the back side too, for continuity. Then I hot-glued 2 lollipop sticks to the back which will be inserted in 2 cupcakes at the wedding (which will be the bride & groom's cupcakes!)
IN PROGRESS: Gate Banner
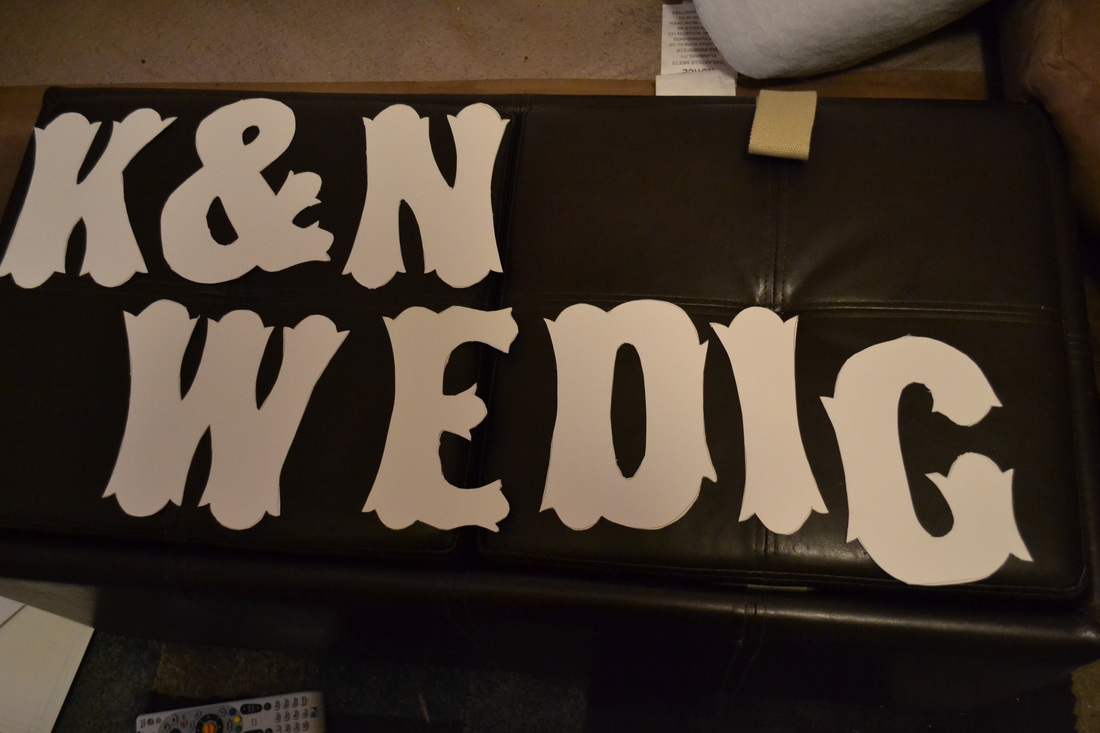
I am in the process of creating a banner for the gate that you enter to my venue (pics on the "Venue" page). I haven't decided if I want to do it with glitter or moss. But I traced the letters onto thick paper & cut them out, and will use those are templates to cut out foam board. (Also, I didn't cut out more than one of each letter - so the N and D will be used twice each to cut out the foam board!) To be continued!
Ring Bearer Pillow
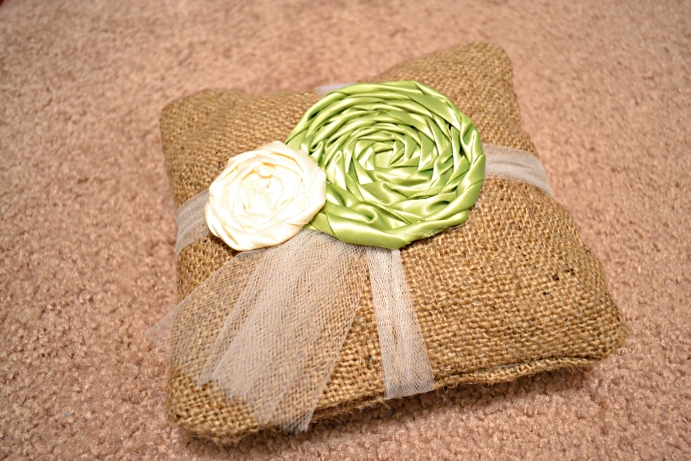
I made the ring bearer pillow out of burlap I bought on Etsy (it was $2.50 for a half yard, plus $3 shipping). I cut out two 10x10 inch pieces, pinned the edges together, and ironed with hem tape to seal 3 of the sides. Then I flipped it inside out (so the seams were inside) and stuffed with cotton balls I had on-hand. Then I pinned the 4th side to face inward, with hem tape and ironed it to glue the pieces together.
Then I simply tied it up with white tulle (like you wrap a present) and left the extra to tie on faux rings later; I hot glued the ribbon flowers I had previously made. Still need to add pretty flower centers.
Total cost of this project: $5.50
(Cost of ribbon flowers & tulle are in other projects)
Then I simply tied it up with white tulle (like you wrap a present) and left the extra to tie on faux rings later; I hot glued the ribbon flowers I had previously made. Still need to add pretty flower centers.
Total cost of this project: $5.50
(Cost of ribbon flowers & tulle are in other projects)
Flower Girl Pomanders
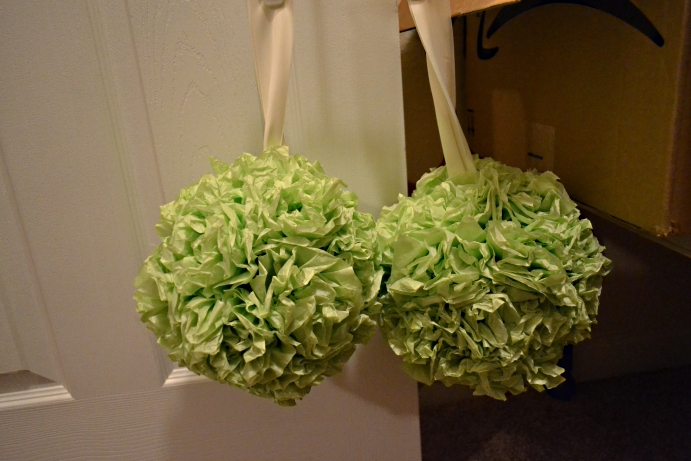
I made these flower girl pomanders following a tutorial I found online. Basically, I bought two 3 inch floral foam balls and green tissue paper (other supplies I had on hand).
You make them by taking your tissue paper and cutting it into many many 5x7 inch sheets. Then, taking 4 sheets at a time, fold accordion-style. Then use wire (I used bobby pins, because I forgot to buy wire. It worked perfectly) and wrap around the center of the accordion; then lift up one side of each sheet of tissue paper at a time, overlapping the edges, to form a flower. I then hot glued the bottom of my flower, and pushed it into the foam ball. And repeat!
Total cost of this project, per pomander: $3.97 ($3 foam ball; $.97 tissue paper pack)
Ribbon Flowers
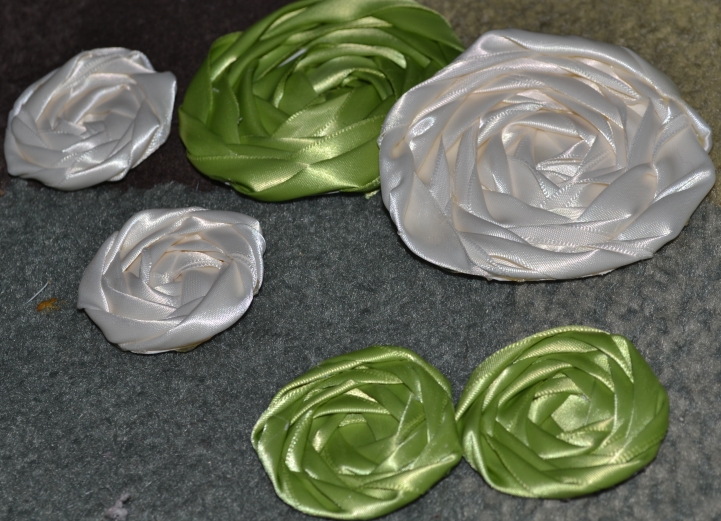
I made these ribbon flowers using ivory and green ribbon I bought at Wal-Mart. Simply cut out circles with a heavy paper (I used sketch paper I had on-hand) in whatever size(s) you want your flower(s). Then, hot glue the end of your ribbon to the center of a circle. I used the end of my scissors to push down, since ribbon is thin and the hot glue is, well, hot!
Start "rolling" the ribbon, about a 3/4 turn, the hot glue, and repeat. It won't look perfect but once you're finished it will look good, I promise! It's just a messy process. Be sure to hot glue frequently and slightly overlap the ribbon so you don't see the cardstock beneath.
Total cost:
$1.97 per roll of 15 yds. of ribbon
so $3.94 (2 rolls) created about 2 large and 3 small flowers each. (Not all of mine are pictured)
Flower Girl Tutus
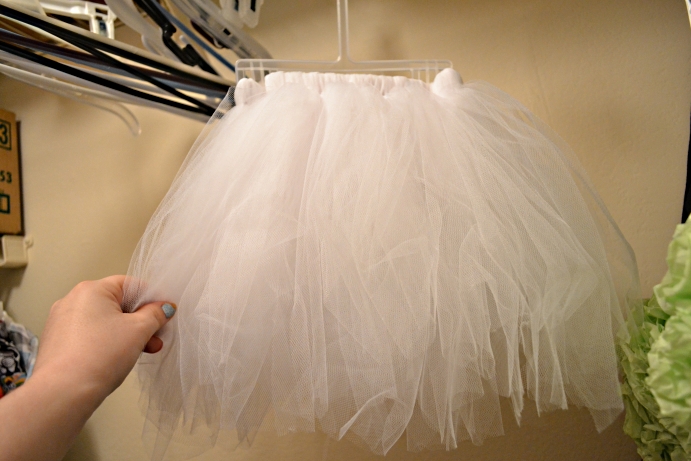
These too are simple. I bought a pack of elastic (3 yards, I believe) and a roll of Wilton white tulle (6 inches x 65 yards). I guesstimated the length of elastic I needed to fit my flower girls' waists (they are my nieces). Then I also guessed about how long I wanted the skirt to be, and doubled that; then I cut the tulle repeatedly to that length. Say I wanted it to be a 12" long skirt, so I cut the tulle every 24".
Tie the elastic in a knot. Go ahead and cut up ALL OF YOUR TULLE. Otherwise it's annoying to have to keep stopping and going, and hard to keep the tulle to the correct length. Fold the tulle in half, and hold the loop inside the elastic. Then bring the ends through the loop, and tighten so that it's wrapped around the elastic, and the ends hang down. Repeat over and over...
Total cost per skirt: $6.48
$6 per roll of tulle; $.97 for the elastic. I used half the elastic per skirt, and one roll of tulle per skirt.
